使用 PHP 生成影象
Sheeraz Gul
2024年2月15日

PHP 有一個用於影象處理操作的內建庫 GD。該庫還可以生成不同格式的影象。
GD 庫預設不啟用;你需要從 php.ini 啟用它。
在 PHP 中使用 GD 庫生成 JPEG 影象
首先,檢查 GD 庫是否啟用;可以從 phpinfo() 或 php.ini 檢查。一旦從 php.ini 啟用,我們就可以開始建立影象了。
<?php
// Create a blank image and add some content
$new_image = imagecreatetruecolor(400, 400);
$bg_color = imagecolorallocate($new_image,  125, 125, 125);

// Set the background color
imagefill($new_image, 0, 0, $bg_color);
$text = imagecolorallocate($new_image, 225, 225, 225);
imagestring($new_image, 25, 50, 200,  'Welcome to Delftstack Tutorial.', $text);
imagestring($new_image, 15, 50, 240,  'This is JPEG image generation', $text);

// Save the image as jpeg
imagejpeg($new_image, 'delftstack.jpeg');

// Free the memory
imagedestroy($new_image);
?>
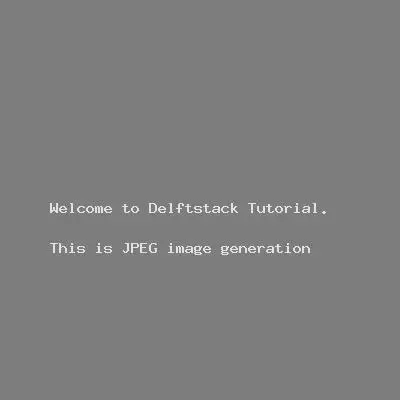
上面的程式碼生成一個 400x400 的 jpeg 影象,給定的內容為字串,背景顏色為灰色。
輸出:
在 PHP 中使用 GD 庫生成 PNG 影象
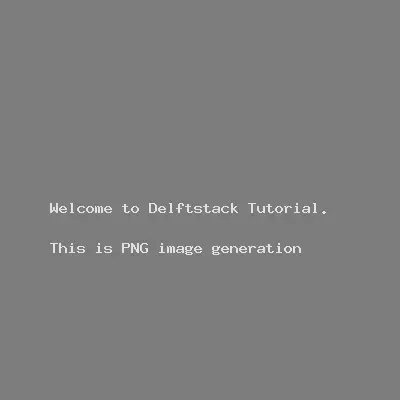
生成 png 影象的過程幾乎相同,只是將影象儲存為 png。
<?php
// Create a blank image and add some content
$new_image = imagecreatetruecolor(400, 400);
$bg_color = imagecolorallocate($new_image,  125, 125, 125);

// Set the background color
imagefill($new_image, 0, 0, $bg_color);
$text = imagecolorallocate($new_image, 225, 225, 225);
imagestring($new_image, 25, 50, 200,  'Welcome to Delftstack Tutorial.', $text);
imagestring($new_image, 15, 50, 240,  'This is PNG image generation', $text);

// Save the image as png
imagepng($new_image, 'delftstack.png');
// Free the memory
imagedestroy($new_image);
?>
輸出:
在 PHP 中使用 GD 庫繪製影象
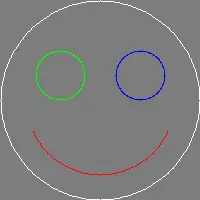
GD 庫幾乎沒有內建函式來繪製特定圖形,包括 imagearc()、imagefilledpolygon()、imagechar() 和 imageellipse()。
繪製弧線:
<?php
$new_image = imagecreatetruecolor(200, 200);
$color_white = imagecolorallocate($new_image, 255, 255, 255);
$color_red   = imagecolorallocate($new_image, 255,   0,   0);
$color_green = imagecolorallocate($new_image,   0, 255,   0);
$color_blue  = imagecolorallocate($new_image,   0,   0, 255);
$bg_color = imagecolorallocate($new_image,  125, 125, 125);
imagefill($new_image, 0, 0, $bg_color);
// drawing a smiling face
//head
imagearc($new_image, 100, 100, 200, 200,  0, 360, $color_white);
// smile
imagearc($new_image, 100, 100, 150, 150, 25, 155, $color_red);
// eyes
imagearc($new_image,  60,  75,  50,  50,  0, 360, $color_green);
imagearc($new_image, 140,  75,  50,  50,  0, 360, $color_blue);

//save image
imagepng($new_image,'arcimage.png');

// free memory
imagedestroy($new_image);

?>
輸出:
讓我們畫一個多邊形:
<?php
// value points for polygon
$polygon_values = array(
            30,  80,
            50,  240,
            29,  80,
            240, 80,
            58,  60,
            100,  100
            ); // The random (x,y) points

$new_image = imagecreatetruecolor(250, 250);
$bg_color   = imagecolorallocate($new_image,  125, 125, 125);
$color_blue = imagecolorallocate($new_image, 0, 0, 255);

// Fill the background color
imagefilledrectangle($new_image, 0, 0, 249, 249, $bg_color);

// draw the polygon
imagefilledpolygon($new_image, $polygon_values, 6, $color_blue);

//save image
imagepng($new_image, 'polygon.png');
imagedestroy($new_image);
?>
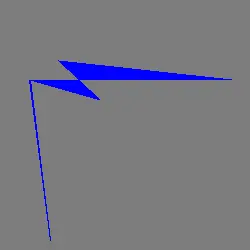
上面的程式碼將生成一個具有給定隨機值的多邊形。
輸出:
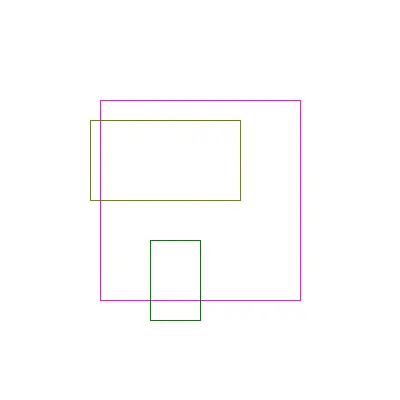
讓我們嘗試繪製矩形。
<?php
$new_image = imagecreatetruecolor(400, 400);
$bg_color = imagecolorallocate($new_image,  255, 255, 255);
// Set the background color
imagefill($new_image, 0, 0, $bg_color);
// colors of rectangles
$color_magenta = imagecolorallocate($new_image, 255,0,255);
$color_olive = imagecolorallocate($new_image, 128,128,0);
$color_green = imagecolorallocate($new_image, 0,128,0);

//three rectangles with different size and color
imagerectangle($new_image, 100, 100, 300, 300, $color_magenta);
imagerectangle($new_image, 90, 120, 240, 200, $color_olive );
imagerectangle($new_image, 200, 240, 150, 320, $color_green);

//save image
imagepng($new_image, 'rectangles.png');
imagedestroy($new_image);
?>
上面的程式碼將在一張影象中生成三個矩形。
輸出:
GD 庫有更多的功能來繪製不同的影象。這些函式可以很容易地與給定的引數一起使用。
作者: Sheeraz Gul
Sheeraz is a Doctorate fellow in Computer Science at Northwestern Polytechnical University, Xian, China. He has 7 years of Software Development experience in AI, Web, Database, and Desktop technologies. He writes tutorials in Java, PHP, Python, GoLang, R, etc., to help beginners learn the field of Computer Science.
LinkedIn Facebook