建立 JavaFX 訊息框
Mehvish Ashiq
2024年2月15日
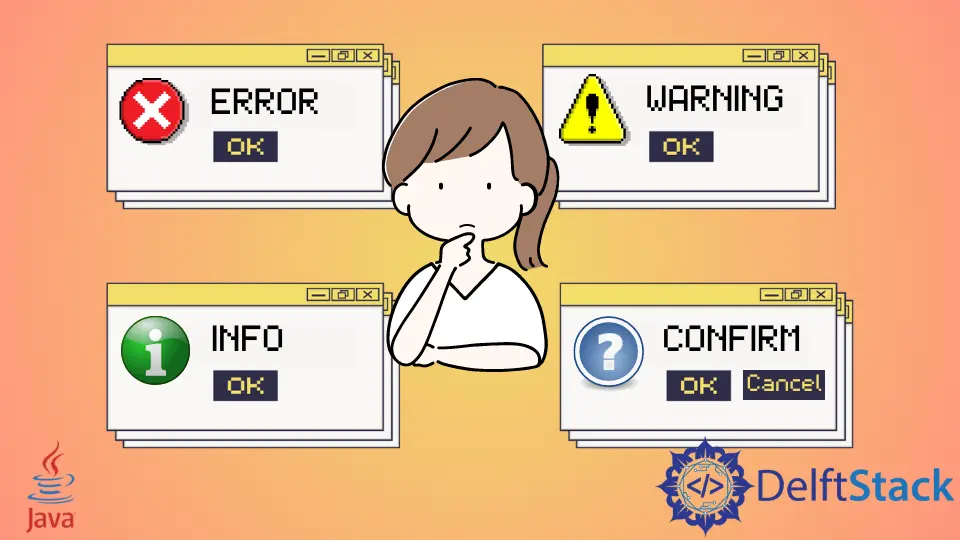
今天的教程演示了在我們的 Java 應用程式中建立一個 JavaFX 訊息框。訊息框可以是確認、警告、資訊或錯誤警報。
建立 JavaFX 訊息框
為了完成以下示例程式碼,我們使用 Java 版本 18、JavaFX 版本 13 和 Netbeans IDE 版本 13。
示例程式碼:
// write your package name
package com.mycompany.javafx_messagebox;

// import required libraries
import javafx.application.Application;
import javafx.event.ActionEvent;
import javafx.geometry.Insets;
import javafx.scene.Scene;
import javafx.scene.control.Alert;
import javafx.scene.control.Alert.AlertType;
import javafx.scene.control.Button;
import javafx.scene.layout.TilePane;
import javafx.stage.Stage;

/**
 * JavaFX App
 */
public class App extends Application {
  @Override
  public void start(Stage stage) {
    // create a tile pane
    TilePane r = new TilePane();
    // add padding
    r.setPadding(new Insets(10, 10, 10, 10));

    // an array of button names
    String[] buttonNames = {"Confirmation MessageBox", "Error MessageBox", "Information MessageBox",
        "Warning MessageBox"};

    // Show no alert at the startup of the program
    Alert alert = new Alert(AlertType.NONE);

    /*
    a loop to create buttons, define actions when
    they are pressed and add them to the tile pane
    */
    for (String s : buttonNames) {
      Button button = new Button(s);

      button.setOnAction((ActionEvent event) -> {
        if (null != button.getText()) {
          switch (button.getText()) {
            case "Confirmation MessageBox":
              // set alert type, title, content text and then show it
              alert.setAlertType(AlertType.CONFIRMATION);
              alert.setTitle("Confirmation MessageBox");
              alert.setContentText("This is a CONFIRMATION "
                  + "message for you!");
              alert.show();
              break;
            case "Error MessageBox":
              // set alert type, title, content text and then show it
              alert.setAlertType(AlertType.ERROR);
              alert.setTitle("Error MessageBox");
              alert.setContentText("This is an ERROR message for you!");
              alert.show();
              break;
            case "Information MessageBox":
              // set alert type, title, content text and then show it
              alert.setAlertType(AlertType.INFORMATION);
              alert.setTitle("Information MessageBox");
              alert.setContentText("This is a INFORMATION "
                  + "message for you!");
              alert.show();
              break;
            case "Warning MessageBox":
              // set alert type, title, content text and then show it
              alert.setAlertType(AlertType.WARNING);
              alert.setTitle("Warning MessageBox");
              alert.setContentText("This is a WARNING message for you!");
              alert.show();
              break;
            default:
              break;
          }
        }
      });

      // add button
      r.getChildren().add(button);
    }

    // create a scene
    Scene sc = new Scene(r, 640, 50);

    // set the scene
    stage.setScene(sc);

    // show the stage
    stage.show();

  } // end start method

  // main method
  public static void main(String[] args) {
    launch(args);
  } // end main

} // end App class
輸出(主視窗):

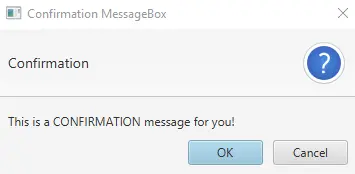
輸出(確認訊息框,當我們點選 Confirmation MessageBox 按鈕時顯示):
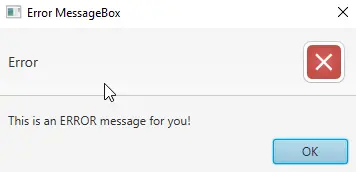
輸出(錯誤訊息框,當我們點選 Error MessageBox 按鈕時顯示):
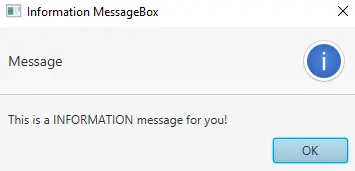
輸出(資訊訊息框,當我們點選 Information MessageBox 按鈕時顯示):
輸出(警告訊息框,當我們點選警告訊息框按鈕時顯示):
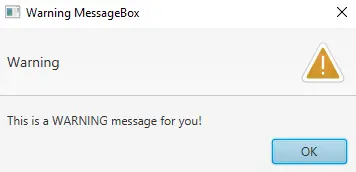
對於本教程,我們不需要對 module-info.java 和 pom.xml 檔案進行任何更改。建立一個 JavaFX 專案並練習上面給出的程式碼。
我們有一個名為 App 的主類,它擴充套件了 Application 類(這是 Java 中的標準)。你可以命名主要啟動類(App)。
接下來,我們重寫 start() 方法,因為 App 是 Application 類的子類。請記住,子類需要實現父類的所有抽象函式/方法。
之後,我們有一個 start() 方法,它採用 Stage 型別的一個引數。我們使用 Stage 型別引數,因為這是顯示所有可視元件 JavaFX 應用程式的地方。
我們不需要建立 Stage 型別物件,因為 JavaFX 執行時會建立它。以下是對 start() 方法內部內容的分步說明。
-
建立一個 JavaFX
TilePane的物件,它是一個佈局元件,並將其所有子元件佈置在相同大小的單元格的網格中。 -
在整個網格周圍新增邊距(
上/右/下/左)。 -
建立一個包含此應用程式所需的所有按鈕名稱的陣列。
-
建立一個
NONE型別的警報訊息框,因為我們不想在程式啟動時顯示任何訊息框。 -
接下來,我們有一個
for迴圈,它遍歷所有按鈕名稱。- 在迴圈內,我們建立一個當前名稱的按鈕。
- 根據條件為該特定按鈕設定操作。我們使用
switch語句獲取按鈕文字並根據按鈕名稱顯示一個訊息框。
-
將按鈕新增到
TilePane。 -
使用
Scene類建立場景。 -
設定場景。
-
最後,展示舞臺。
現在,輪到 main 方法了。我們可以在沒有 main 方法的情況下啟動 JavaFX 應用程式,但是當我們需要使用通過命令列傳遞給應用程式的引數時,它很有用。
作者: Mehvish Ashiq
